Healthy Chocolate Truffles with Peppermint
This post contains affiliate links, which means I may receive a small commission at no extra cost to you. I only share products and services I have personally used and love. Disclosure here.

Truffles seem like one of those indulgent items that are probably too complicated to make yourself, right? That’s what I always thought too, but it turns out, they’re actually REALLY EASY to make. I wanted to create healthy chocolate truffles that tasted decadent but remained dairy free. The truth is as much as I love dairy (gimme all the cheese) I don’t have it that often as I find it makes me break out. Turns out, an easy swap of full fat coconut milk (from the can) will work as a great substitute for heavy cream.
This post was originally shared in 2019 but has since been updated with newer photos.
Bring on The Holidays!
As the holiday season is fast approaching, I’m taking some time to really reflect on everything that has happened this year. I would say 2019 was a year that tested me IN. EVERY. WAY. possible. And when I talk to others about how 2019 went for them, I am getting much of the same energy. It seems that 2019 was a big year for a lot of people. I would say this year started out terribly (you can read about that here), but I wouldn’t change how things happened at all.

Because the things that happened have changed me and my life forever. I learned so much about myself, what I can handle, what I won’t take and how strong and resilient I am. Things definitely turned around for me mid-year and although I didn’t think at the beginning of the year this could happen, it was a truly transformative one. And I CANNOT wait to see what 2020 brings!
Edited in December 2021 to add: I don’t think anyone could’ve predicted 2020 lol.

How to Make Healthy Chocolate Truffles
These healthy chocolate truffles really could not be easier to make and even if you kind of mess them up, I find they still work in the end. I wanted to give as many tips as possible to make the truffle making process super easy.
Chop the Chocolate
Before even beginning anything, ensure that the dark chocolate you are using is chopped really well. And make sure that they are all chopped to roughly the same size. This will help to ensure that your chocolate melts at the same consistency.

Soften the Butter/Ghee
I liked using some ghee for these healthy chocolate truffles as it helps make them SUPER creamy and even more decadent. Remember to take out your butter or ghee from the fridge so that it is room temperature and softened. If you forget, try and soften it by placing the jar of ghee in some warm water for a bit to help speed up the process. This is important to ensure that the ghee/butter is evenly distributed when stirring.
Heat the Coconut Milk Just Slightly
When you add the coconut milk to the chocolate, it is important to just slightly simmer the milk on the stove. You don’t want it boiling too much, otherwise the chocolate can get a little greasy looking when you mix it up. This happened to me, but after it’s done cooling, it did still work in the end. But best to avoid it, and keep your coconut milk at a low simmer only.
Add the Milk to the Chopped Chocolate
Add the softened ghee/butter and collagen to the chopped chocolate. Pour the coconut milk over top and let it sit for about 5 minutes.
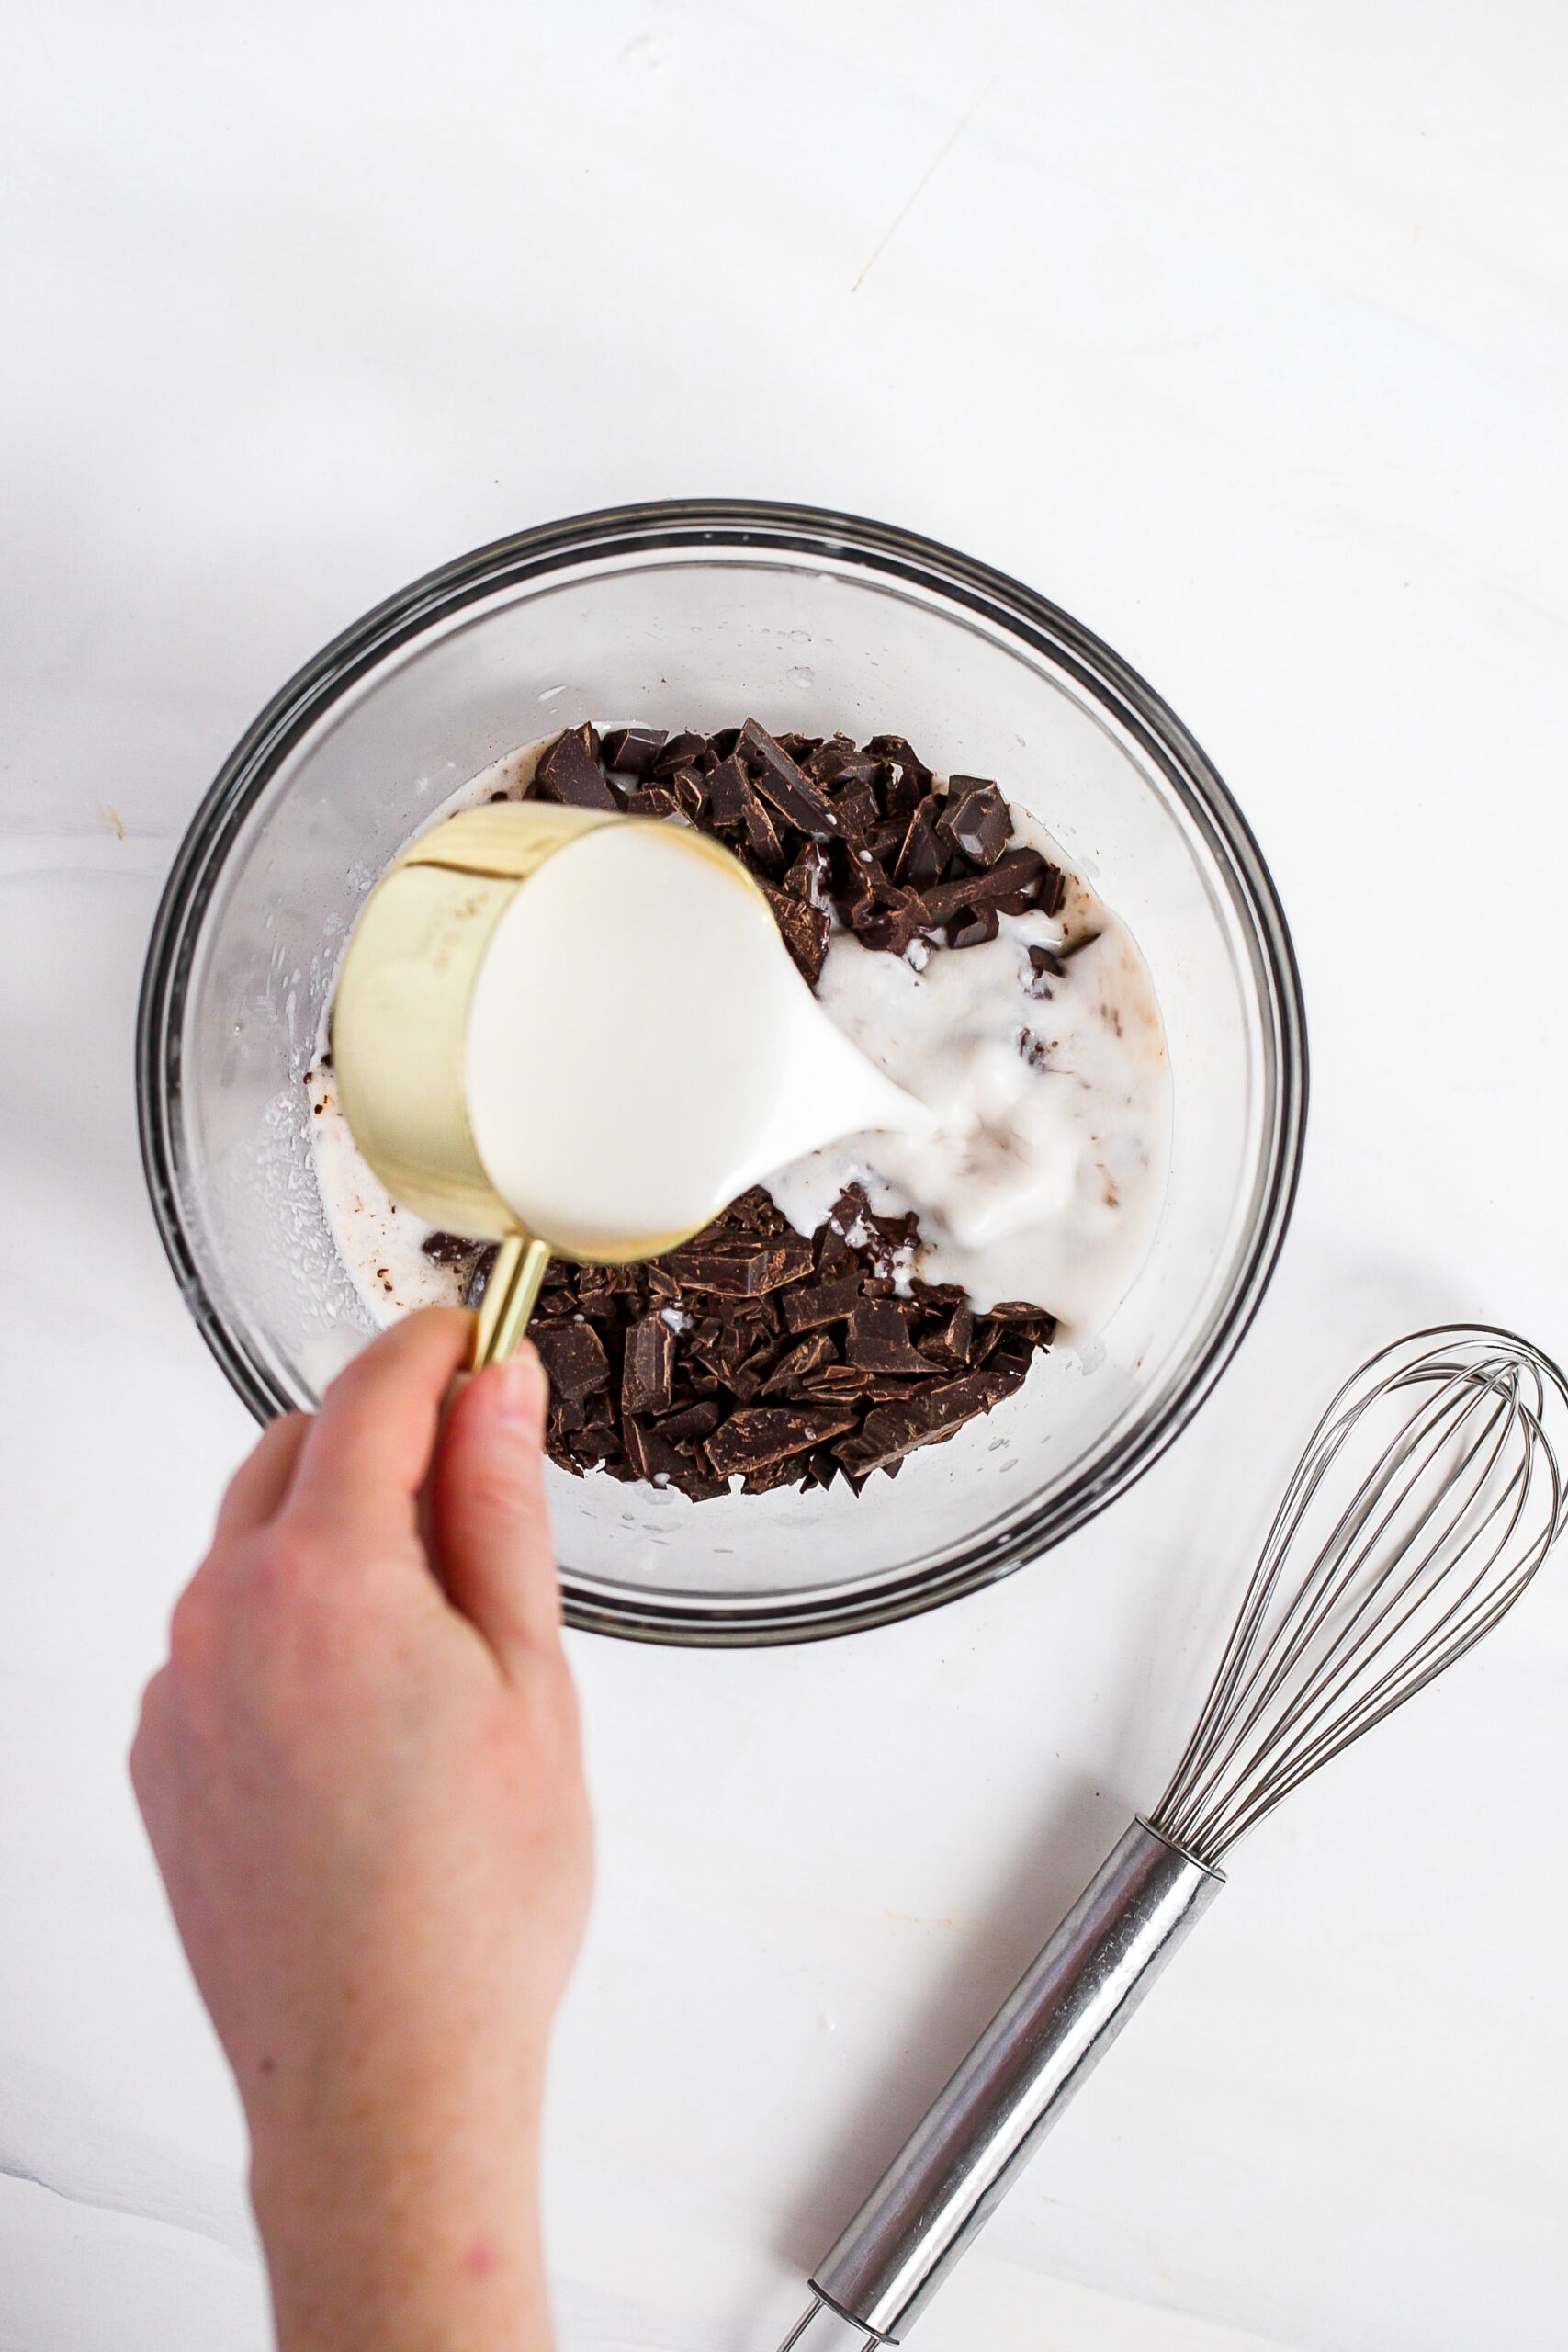
Stir in the peppermint extract and stir.

Keep stirring!

If the chocolate is not melting, gently heat it over a double boiler on the stove. This will ensure it is all melted and smooth. See the photo below for how smooth it should look.

Move the truffles to the fridge to harden
Move the bowl to the fridge and let it sit for at least 2 hours, or overnight to firm up. Remove the bowl from the fridge and use an ice cream scoop or cookie scoop (about 2 tsp worth of chocolate) and roll into balls.
Roll into balls and Choose Your Own Topping
Roll into toppings of your choice and let them sit on a parchment lined baking sheet to harden (if using melted chocolate). You can move them to the fridge to have them set quicker. Store them in the fridge until ready to enjoy, leaving them out to be at room temperature for about 10 to 15 minutes prior to eating.
One topping idea is to simply roll them in cocoa powder.

Melt come chocolate and roll the chocolate truffles in that, and then add sprinkles, crushed candy cane or flaky sea salt on top.

How to Store Your Healthy Chocolate Truffles:
When you’re storing your chocolate truffles, keep them in the fridge. You can also prepare the batter ahead of time and keep that in the fridge for a few days if you need. I like eating them at room temperature after taking them out of the fridge for about 15 minutes.
I recommend storing them in a plastic or glass container in the fridge for up to two weeks for best results.

Swaps for Making Your Own Healthy Chocolate Truffles:
No Peppermint
If you don’t want to make these truffles with peppermint, you can omit the peppermint extract. You could use vanilla instead which would add a really nice flavour.

Coating Options
When it comes to how you want to coat your healthy chocolate truffles, you have SO MANY OPTIONS!
- Add crushed candy cane for a festive option
- Add chopped nuts (hazelnuts would be delicious)
- More chocolate: roll them in cocoa powder, or melted chocolate and let them harden
- Add flaky sea salt on top (this is such a classic combo)

Coconut Milk
I use canned full fat coconut milk for this recipe. I recommend only using this or heavy cream for a dairy option. If you don’t like the taste of coconut, don’t worry, you don’t taste it in the finished product.
Ghee or Butter
If you need to keep them completely dairy free or vegan, omit the butter or ghee. You could try adding some coconut oil or vegan butter, however, I haven’t personally tried this method yet. Omitting it won’t affect the final product, it just won’t be as creamy.

Why I Love Adding Collagen:
I have been on a collagen kick for quite a while and I don’t see it stopping anytime soon. You can read more about collagen over here!
As for the brand I love and use, it’s Sproos. This is a Canadian company that focuses exclusively on collagen and produces a high quality product. I love using their marine collagen and the MCT collagen creamer the most.
I like adding collagen to these to amp up the protein just a little and it offers other health benefits as well, especially for your skin, joints and gut. If you don’t use collagen or don’t want to add it, you can of course omit it.

I hope you love these healthy chocolate truffles as much as I do! If you make them, let me know by tagging me on Instagram and/or leave a comment and rating below!
For this recipe, I was inspired by the amazing Sally, from Sally’s Baking Addiction. You can check out her recipe here!
This post contains affiliate links, which means I may receive a small commission at no extra cost to you. I only share products and services I have personally used and love. Disclosure here.
Print
Healthy Chocolate Truffles with Peppermint
- Prep Time: 10
- Cook Time: 5
- Total Time: 15 minutes
- Yield: 22 1x
- Category: dessert
- Method: stovetop
- Cuisine: American
Description
These delicious and decadent healthy chocolate truffles with peppermint are easy to prepare and perfect for the holidays.
Ingredients
For the Truffles
- 200 g Dark Chocolate Bars chopped fine
- 2/3 cup Coconut Milk full fat, from the can
- 1 tbsp Ghee or organic butter, softened
- 2 scoops Collagen marine, optional
- 1/2 tsp Peppermint Extract
For the Chocolate Topping
- 1/3 cup Chocolate Chips
- 1/2 tsp Coconut Oil
- pinch Flaky Salt
For The Peppermint/Candy Cane Topping
- 2 tbsp Crushed Candy Cane
For the Cocoa Powder
- 2 tbsp Cocoa Powder
Instructions
- Finely chop the chocolate bars and place in a medium sized bowl.
- In a small pot on the stove over medium-low heat, add the coconut milk and bring to a low simmer.
- Add the softened ghee/butter and collagen to the chopped chocolate. Pour the coconut milk over top and let it sit for about 5 minutes. Stir in the peppermint extract and stir until everything is combined. If the chocolate is not melting, gently heat it over a double boiler on the stove. This will ensure it is all melted and smooth.
- Move the bowl to the fridge and let it sit for at least 2 hours, or overnight to firm up.
- Remove the bowl from the fridge and use an ice cream scoop or cookie scoop (about 2 tsp worth of chocolate) and roll into balls.
- Roll into toppings of your choice and let them sit on a parchment lined baking sheet to harden (if using melted chocolate). You can move them to the fridge to have them set quicker. Store them in the fridge until ready to enjoy, leaving them out to be at room temperature for about 10 to 15 minutes prior to eating.
Notes
If the truffles are really sticky and hard to roll, you can scoop them out (don’t roll them) and leave them on the parchment lined baking sheet. Move them to the fridge for about 15 minutes, then remove them and try rolling them.
I kept mine in the fridge overnight and took them out to leave the mix at room temperature for about 5 minutes. Then I rolled them and did not find them too sticky.

