Hot Chocolate Cookies with Marshmallows
This post contains affiliate links, which means I may receive a small commission at no extra cost to you. I only share products and services I have personally used and love. Disclosure here.

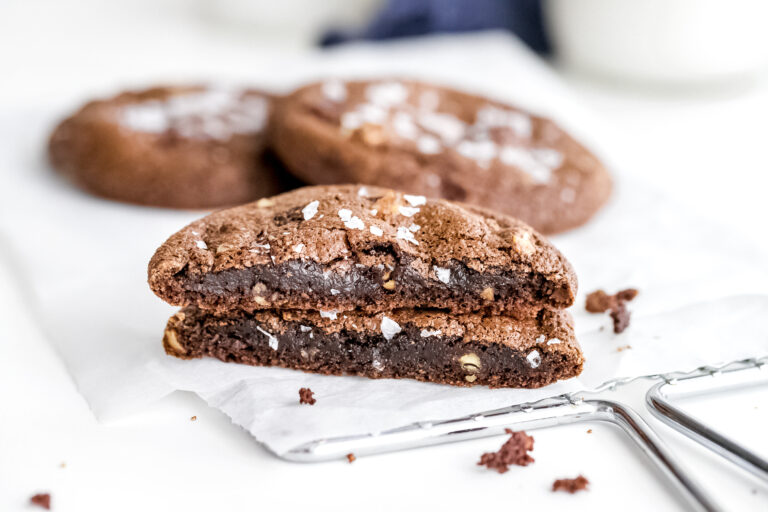
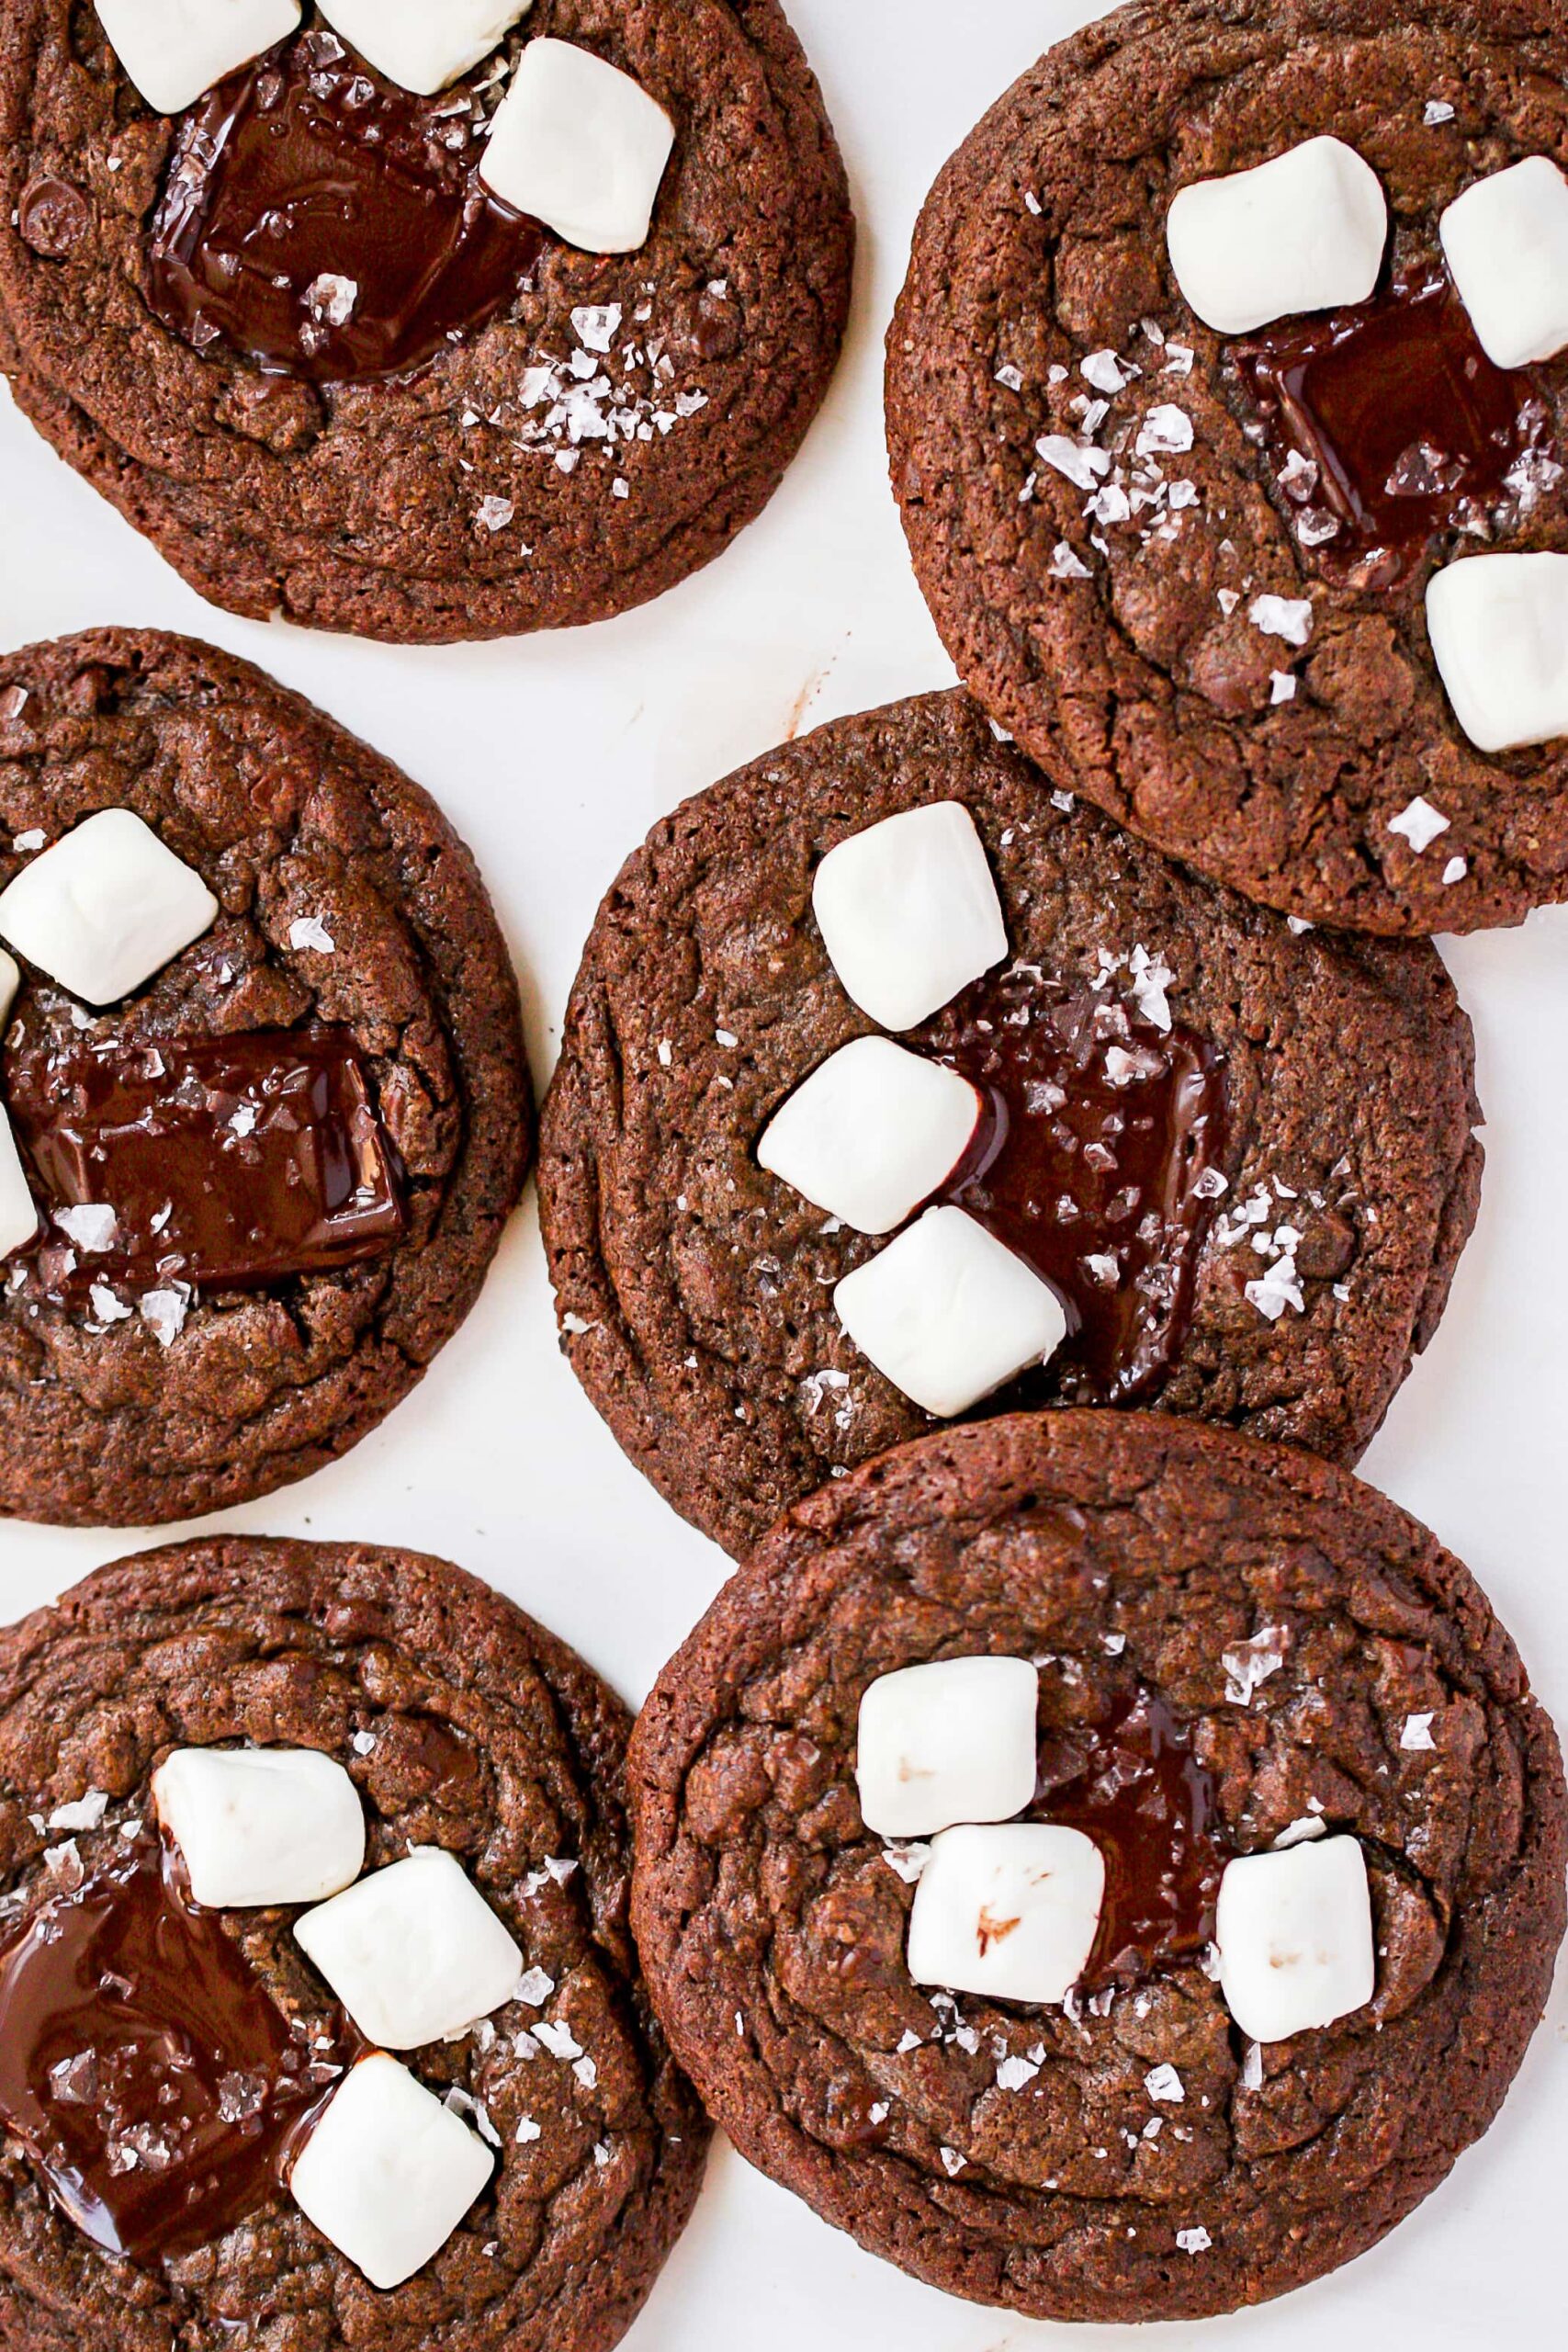
Craving hot chocolate and also a cookie? These peppermint hot chocolate cookies are reminiscent of a cozy cup of hot chocolate complete with marshmallows. I’m telling you, these cookies are love at first bite and you don’t need to limit them just to winter time. They’d be great in the summer too, sort of like a S’mores cookie, just omit the peppermint extract. Feel free to use your favourite hot cocoa mix. Perfectly soft and chewy with pools of dark chocolate, these gluten free double chocolate cookies are seriously heaven.

What are Hot Chocolate Cookies?
To me, these hot chocolate cookies are just like the name implies, hot chocolate in cookie form. I made them using a hot cocoa mix and added extra pieces of dark chocolate and marshmallows. They’re rich, fudgy and soft with beautiful ripples around them and they just happen to be gluten free. They’re quite honestly the best double chocolate cookies I’ve ever made, and they’re giving my chocolate brownie cookies (aka- brookies) a run for their money. To make them taste even more like a hot cup of cocoa, I added in a bit of peppermint extract. You could also top them with a little crushed candy cane too if you want.

Basically, if you’re wanting to feel all cozy (and who doesn’t in the winter), these are the cookies to make and curl up with. And if you really want to get a little crazy, have them with a cup of hot cocoa too 😉 You won’t regret it!

The Ingredients
These hot cocoa cookies are based off of a similar recipe on my site, specifically these gluten free pumpkin chocolate cookies. The ratio of flours is really what I love here. So although there are three different flours, gluten free baking typically depends on using more than one flour in the final product.

Here are all the ingredients you’ll need to make these hot chocolate cookies. Don’t be intimidated by the number of ingredients, most of these are basic ingredients (butter, eggs, dark chocolate, brown sugar, marshmallows). If you’re looking for swaps, be sure to check that out near the end of this post.

White Rice Flour:
White rice flour is a great (affordable) gluten free flour that you can find almost anywhere. You can use brown rice flour if you choose, either will work. Rice flour helps the cookies hold together and creates a nice smooth texture.
I like this brand of rice flour.
Oat Flour:
Be sure to source a gluten free oat flour for this recipe if you need to be sure that there is no gluten. You can of course make your own flour from gluten free oats, but you’ll need to be sure that it’s very finely ground. Oat flour provides some earthiness to the cookies.
I like this brand of oat flour.
Tapioca Flour:
A little bit of tapioca flour helps the cookies have more chew and also keeps the cookies soft in the middle (YES PLEASE!)
I like this brand of tapioca flour.
1 Egg & 1 Egg Yolk:
Egg yolks are great for adding to cookies to give them more of that chewiness in the final product. The remaining whole egg helps to bind the cookies and to add moisture.
Dark Chocolate:
My go to when making cookies is to use a good quality 70% dark chocolate. It has so much flavour and the texture of the rugged chocolate chunks is far superior to chocolate chips. If you only have chocolate chips, use them, but if you can, I highly suggest using dark chocolate and roughly chopping it yourself. These are what you’ll need for those dark pools of chocolate.
I like using this dark chocolate.
You’ll also need chocolate chips for adding in to the mix before baking and for melting to add to the dough. Feel free to use one or the other. Personally, I just like using the chunks of dark chocolate from the bars for adding to the balls of dough once I’m ready to bake. Because nothing beats biting into a pool of melted chocolate!
I like this brand for chocolate chips.
Dark Brown Sugar:
Dark brown sugar combined with some granulated sugar gives these cookies more flavour. You can use all brown sugar and no white if you need to, but the amount of white sugar is pretty small in this recipe. Alternatively, you can use coconut sugar as well.
I like this brand for dark brown sugar and for granulated sugar.
Hot Chocolate Mix:
Depending on the type of hot chocolate mix you use, you may want to lessen the amount of sugar you add. Most hot chocolate mixes have sugar in them already.
There are so many to choose from, I like this brand.
Butter:
Melted butter adds richness and moisture to this recipe. I like to opt for a high quality, organic and/or grass-fed butter.
Baking Soda:
Baking soda helps the cookies spread a bit more, which is what we’re after with these gluten free cookies.
Peppermint Extract:
To really add to the whole hot cocoa vibe, I like adding in some peppermint extract to the mix. If you don’t like peppermint, or don’t have it, you can omit it.
I like this brand for peppermint extract.
Marshmallows:
What’s a hot cocoa without marshmallows?! Adding just a few to each cookie makes a big difference and the texture is SO good.
I use these mini vegan marshmallows.

How to Make These Healthy(ish) Cocoa Cookies
Here is exactly how to make these delicious hot chocolate cookies.
Melt your butter and chocolate
There is no need to brown the butter for this recipe, just simply melt it on the stovetop or in a microwave safe container. Then, melt your chocolate chips.
Now, add the melted butter and chocolate to a large bowl and let cool just a bit so it’s warm to the touch. Then add in your sugars, peppermint extract and the egg yolk and whole egg. Whisk very well until the sugars are combined, about 45 seconds to 1 minute. Set aside.

Mix together your dry ingredients
In a medium sized bowl, whisk together the flours, baking soda, hot chocolate mix and salt.

Now, add the dry ingredients to the wet and stir until incorporated well. Fold in the reserved chocolate chips (if using).

Refrigerate Your Dough
Refrigerate the dough for at least 30 minutes, up to one hour. The dough will be too soft and sticky to use right away, plus it will spread too much if you don’t refrigerate it.
Get Ready to Bake
Now, you’re ready to bake! Line a baking sheet with parchment paper and preheat your oven to 350 degrees. Then grab your dough and roll the balls (you can use slightly damp hands as this makes it easier) into about 2 tbsp worth of dough.
You can either press the chunk of dark chocolate and marshmallows into the balls of dough now if you want the marshmallows slightly browned.
Now, place in the oven to bake for 9 to 10 minutes (mine took 9), until the edges are just starting to brown. The cookies will still look a little undercooked, thats ok. Leave them on the pan to finish baking for a few minutes.
How to Flatten Slightly Puffy Cookies
If the cookies are looking a little puffy right out of the oven, bang the pan down on a hard stable surface. This helps to create those beautiful ripples around the centre. See this post for the pan banging technique. Although this is done during baking, I do it right when I take them out of the oven.

Let Your Cookies Cool
Once you’ve let the cookies sit on the baking sheet for a few minutes, remove and place on a cooling rack. To finish, add some maldon flaky salt on top while still fresh from the oven.
Other Baking Options
The other option is to bake your cookies for six minutes. Then remove from the oven and add the dark chocolate chunks and marshmallows, pressing down slightly. Now, place them back in the oven to bake for the remaining three minutes.
Personally, I found it easier to add them to the uncooked balls of dough and bake them for nine minutes total. I also preferred the slightly toasted marshmallows.

Tips to Making These the Best Gluten Free Cookies EVER
- Mix the dough VERY well: Unlike regular cookies with gluten where you don’t want to over mix, with these gluten free cookies, you’ll want to mix fairly well.
- Don’t skimp on the butter: they will be too puffy if you skimp on butter. You want them to be soft, delicious and flatter.
- Allow the dough to refrigerate: This dough needs to be refrigerated! Don’t skip this or your cookies will be a hot (flattened) mess.
- Let them cool on the pan: Don’t try and take them off from the pan right away. Let them cool for a few minutes and then scoop them off with a spatula.
- Don’t over bake: Yes, they’ll look undercooked, but they continue to bake on the pan. They shouldn’t take longer than 10 minutes in the oven.

Substitutions and Swaps
Flours: the flours I use for this cookie recipe are the only ones I tested and therefore, I wouldn’t recommend changing them.
Dairy-Free: if you need these to be dairy free, ensure you are using dairy free chocolate chips, like these ones and a dairy free dark chocolate bar. You can also try using a good quality vegan butter instead of regular butter.
Peppermint Extract: feel free to omit the peppermint extract, or use vanilla if you’d like.
Marshmallows: you can omit them if you’d like, but I personally really like them in this recipe.
Hot Chocolate Mix: use cocoa powder instead. You may want to increase the amount of sugar if you’re not going to use a hot cocoa mix which has added sugar in it.
Dark Chocolate: feel free to use either a dark chocolate you enjoy (70% is recommended) or chocolate chips. Either will work. Personally, I prefer using both. The chips are for melting and I also use some whole when I’m mixing the dough together. Then, I like to use the dark chocolate for adding chunks to the cookies for that melty pool of chocolate.

How to Store Your Hot Chocolate Cookies
When you first take out the cookies and after letting them cool on the rack, you can keep them out at room temperature in a sealed container for a few days. I like them best served room temperature within the first day or two. Then I like to move them to the fridge in a sealed container. They taste AMAZING from the fridge as they harden slightly, but are still somehow soft. You can also freeze any cookies in a plastic bag as well. They should last in the freezer for a couple months (if you don’t eat them all first!).
If you make these hot cocoa cookies, I’d love to hear from you. Feel free to tag me on Instagram, and/or leave a comment, rating or review below.

This post contains affiliate links, which means I may receive a small commission at no extra cost to you. I only share products and services I have personally used and love. Disclosure here.
LIKE THIS RECIPE? HERE ARE MORE BAKING RECIPES TO TRY:
- Easy, Vegan Homemade Pecan Turtles
- Grain-Free Classic Chocolate Chunk Cookies
- Gluten Free Pumpkin Chocolate Chunk Cookies
- Peppermint Vegan Chocolate Truffles
- No Bake Birthday Cake Cookies
- One Bowl Vegan Pumpkin Bread with Buttercream Icing
- Chocolate Chunk Cookies with Miso
- Paleo Brownie Cookies

Hot Chocolate Cookies with Marshmallows
- Prep Time: 10
- Inactive Time: 30
- Cook Time: 20
- Total Time: 1 hour
- Yield: 14 1x
- Category: dessert
- Method: oven
- Cuisine: American
- Diet: Gluten Free
Description
All the flavours of a hot cocoa in cookie form! These hot chocolate cookies are soft, filled with chocolate and have a hint of peppermint.
Ingredients
For the wet ingredients
- 1/2 cup butter
- 3/4 cup chocolate chips
- 1/3 cup dark brown sugar
- 3 tbsp granulated sugar
- 1 egg
- 1 egg yolk
- 1/2 tsp peppermint extract
For the dry ingredients
- 1/2 cup rice flour
- 1/2 cup oat flour very fine
- 3 tbsp tapicoa flour
- 1/4 cup hot chocolate mix or cocoa powder
- 1/4 tsp baking soda
- 1/4 tsp kosher salt
- 1/3 cup chocolate chips optional
- 150 g dark chocolate chopped into squares for pressing into cookies
- 3/4 cup marshmallows
Instructions
- In a small saucepan (or in microwave safe bowls) melt the butter and chocolate.
- Combine the melted butter and chocolate in a large bowl and let it cool slightly. Then add all remaining wet ingredients and whisk very well for at least 45 seconds to 1 minute, until glossy looking and sugar is mixed in. Set aside.
- In a medium sized bowl, whisk together the flours, hot chocolate mix, baking soda and salt.
- Now, add the dry ingredients to the wet and stir until incorporated very well. Fold in the reserved 1/3 cup chocolate chips (if using).
- Refrigerate the dough for at least 30 minutes, up to one hour.
- Preheat your oven to 350ºF (177ºC) and line a baking sheet with parchment paper. Take your dough out from the fridge and take about 2 tbsp worth of dough and roll them into balls (you can use slightly damp hands as this makes it easier).
- Press one chunk of dark chocolate and about three marshmallows into the balls of dough, pressing down slightly into the dough. Bake in the oven for 9 to 10 minutes (mine took 9), until the edges are just starting to brown. The cookies will still look a little undercooked, thats ok. Leave them on the pan to finish baking for a few minutes. Garnish with flaky salt if desired. If you can’t get all the marshmallows in the cookie when it’s raw cookie dough, add them part way through baking.
- Once you’ve let the cookies sit on the baking sheet for a few minutes, remove and place on a cooling rack to finish cooling.
Notes
Allow the dough to refrigerate: This dough needs to be refrigerated! Don’t skip this or your cookies will be a hot (flattened) mess.
Let them cool on the pan: Don’t try and take them off from the pan right away. Let them cool for a few minutes and then scoop them off with a spatula.
Don’t over bake: Yes, they’ll look undercooked, but they continue to bake on the pan. They shouldn’t take longer than 10 minutes in the oven.

